生成带有自定义策略组和规则的 Clash 配置文件直链-geodata 方案
此方案适用于 Clash,采用 `GEOSITE` 和 `GEOIP` 规则搭配 geosite.dat 和 geoip.dat(或 Country.mmdb)路由规则文件
前言:
- 本教程可以生成扩展名为 .yaml 配置文件直链,可以一键导入使用了 mihomo 内核的 Clash 客户端
如:ShellCrash、OpenClash 和 Clash Verge 等,详见支持 mihomo 的工具 - 生成的订阅链接地址不会改变,支持更新订阅,支持国内访问,支持同步机场节点
- 生成的订阅链接自带规则集,规则集来源 DustinWin/ruleset_geodata/geodata
- 请先确定自己机场的订阅链接是否为 Clash 订阅链接,若不是,需前往肥羊在线订阅转换工具进行转换,“生成类型”选择“Clash”,其它参数保持默认即可,转换后的订阅链接需要在末尾添加
&flag=clash,然后添加到 .yaml 文件代理集合proxy-providers的url中 - 推荐使用 Visual Studio Code 等专业编辑器来修改配置文件
- ShellCrash 支持本地导入配置文件,可以直接将下方的 .yaml 直链文件内容复制到 $CRASHDIR/yamls/config.yaml 文件中,可代替通过 ShellCrash 配置脚本 -> 6 -> 2 导入配置文件的方式
一、 准备编辑 .yaml 直链文件
1. 注册 Gist
进入 https://gist.github.com 网站并注册
2. 打开编辑页面
登录并打开 Gist 可以直接编辑文件,或者点击页面右上角头像左边的“+”图标新建文件
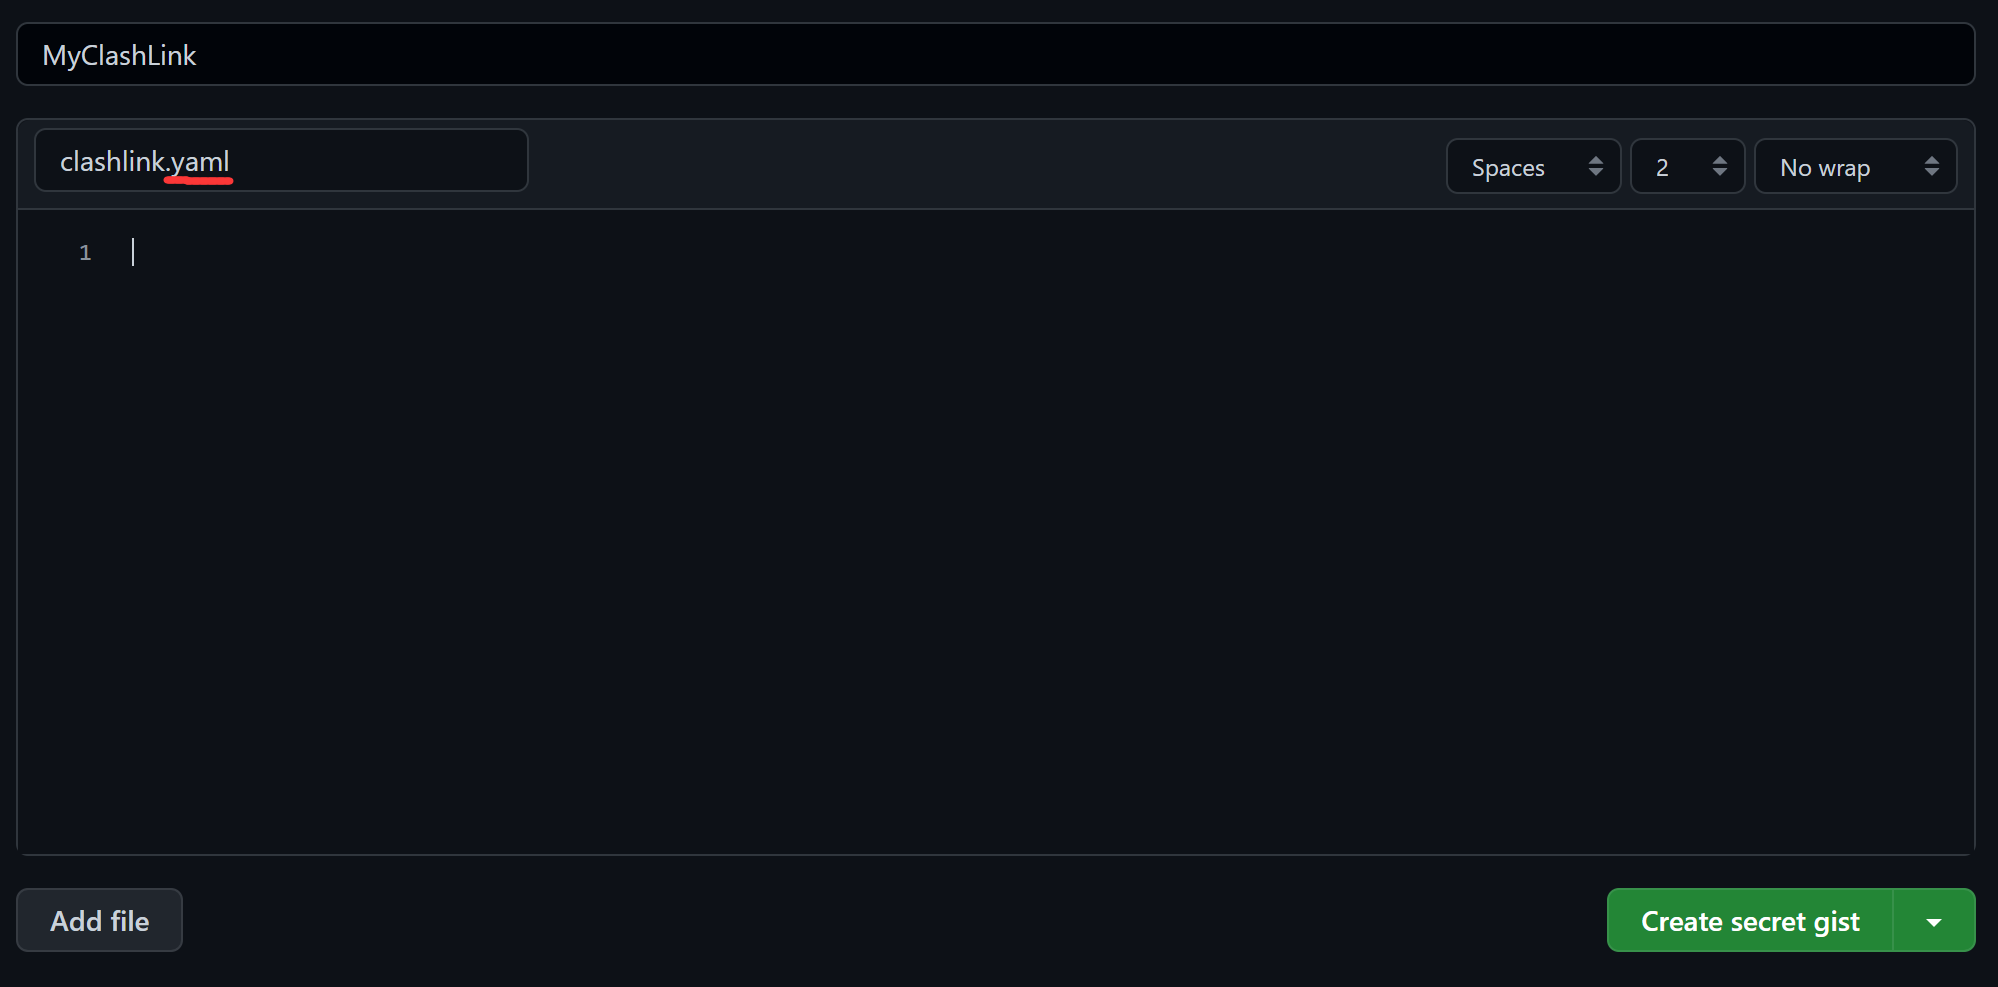
3. 输入描述和完整文件名
“Gist description…”输入描述,随意填写;“Filename including extension…”输入完整文件名包括扩展名,如 clashlink.yaml

二、 添加模板
1. 白名单模式(没有命中规则的网络流量统统使用代理,适用于服务器线路网络质量稳定、快速,不缺服务器流量的用户,推荐)
1
2
3
4
5
6
7
8
9
10
11
12
13
14
15
16
17
18
19
20
21
22
23
24
25
26
27
28
29
30
31
32
33
34
35
36
37
38
39
40
41
42
43
44
45
46
47
48
49
50
51
52
53
54
55
56
57
58
59
60
61
62
63
64
65
66
67
68
69
70
71
72
73
74
75
76
77
78
79
80
81
82
83
84
85
86
87
88
89
90
91
92
93
94
95
96
97
98
99
100
101
102
103
104
105
106
## 代理集合(获取机场订阅链接内的所有节点)
proxy-providers:
  🛫 我的机场 1:
    type: http
    ## 机场订阅链接,使用 Clash 链接
    url: "https://example.com/xxx/xxx&flag=clash"
    path: ./proxies/airport1.yaml
    interval: 86400
    ## 初步筛选需要的节点,可有效减轻路由器压力,支持正则表达式,不筛选可删除此配置项
    filter: "(?i)港|hk|hongkong|hong kong|台|tw|taiwan|日本|jp|japan|新|sg|singapore|美|us|unitedstates|united states"
    ## 初步排除不需要的节点,支持正则表达式,若不排除可删除此配置项
    exclude-filter: "高倍|×10"
    health-check:
      enable: true
      url: https://www.gstatic.com/generate_204
      interval: 600
    override:
      ## 为节点名称添加固定前缀,如节点名称原为“香港节点”会变成“🛫 我的机场 1-香港节点”;推荐有多个机场时使用
      additional-prefix: "🛫 我的机场 1-"
      ## 为节点名称添加固定后缀,如节点名称原为“香港节点”会变成“香港节点-🛫 我的机场 1”;推荐有多个机场时使用
      additional-suffix: "-🛫 我的机场 1"

  🛫 我的机场 2:
    type: http
    url: "https://example.com/xxx/xxx&flag=clash"
    path: ./proxies/airport2.yaml
    interval: 86400
    filter: "(?i)港|hk|hongkong|hong kong|台|tw|taiwan|日本|jp|japan|新|sg|singapore|美|us|unitedstates|united states"
    exclude-filter: "高倍|×10"
    health-check:
      enable: true
      url: https://www.gstatic.com/generate_204
      interval: 600
    override:
      ## 为节点名称添加固定前缀,如节点名称原为“香港节点”会变成“🛫 我的机场 2-香港节点”;推荐有多个机场时使用
      additional-prefix: "🛫 我的机场 2-"
      ## 为节点名称添加固定后缀,如节点名称原为“香港节点”会变成“香港节点-🛫 我的机场 2”;推荐有多个机场时使用
      additional-suffix: "-🛫 我的机场 2"

## 单个出站代理节点(以 vless 为例)
proxies:
  - name: 🆓 免费节点
    type: vless
    server: example.com
    port: 443
    uuid: {uuid}
    network: ws
    tls: true
    udp: false
    sni: example.com
    client-fingerprint: chrome
    ws-opts:
      path: "/?ed=2048"
      headers:
        host: example.com

## 策略组
proxy-groups:
  ## 手动选择国家或地区节点;根据“国家或地区策略组”名称对 `proxies` 值进行增删改,须一一对应
  - {name: 🚀 节点选择, type: select, proxies: [🇭🇰 香港节点, 🇹🇼 台湾节点, 🇯🇵 日本节点, 🇸🇬 新加坡节点, 🇺🇸 美国节点, 🆓 免费节点]}
  ## 若机场的 UDP 质量不是很好,导致某游戏无法登录或进入房间,可以添加 `disable-udp: true` 配置项解决
  - {name: 🐟 漏网之鱼, type: select, proxies: [🚀 节点选择, 🎯 全球直连]}
  ## 选择`🎯 全球直连`为测试本地网络(运营商网络速度和 IPv6 支持情况),可选择其它节点用于测试机场节点速度和 IPv6 支持情况
  - {name: 📈 网络测试, type: select, proxies: [🎯 全球直连, 🇭🇰 香港节点, 🇹🇼 台湾节点, 🇯🇵 日本节点, 🇸🇬 新加坡节点, 🇺🇸 美国节点, 🆓 免费节点]}
  - {name: 🤖 人工智能, type: select, proxies: [🇭🇰 香港节点, 🇹🇼 台湾节点, 🇯🇵 日本节点, 🇰🇷 韩国节点, 🇸🇬 新加坡节点, 🇺🇸 美国节点]}
  - {name: 🎮 游戏服务, type: select, proxies: [🎯 全球直连, 🚀 节点选择]}
  - {name: 🪟 微软服务, type: select, proxies: [🎯 全球直连, 🚀 节点选择]}
  - {name: 🇬 谷歌服务, type: select, proxies: [🎯 全球直连, 🚀 节点选择]}
  - {name: 🍎 苹果服务, type: select, proxies: [🎯 全球直连, 🚀 节点选择]}
  - {name: 🇨🇳 直连域名, type: select, proxies: [🎯 全球直连, 🚀 节点选择]}
  - {name: 🇨🇳 直连 IP, type: select, proxies: [🎯 全球直连, 🚀 节点选择]}
  - {name: 🪜 代理域名, type: select, proxies: [🚀 节点选择, 🎯 全球直连]}
  - {name: 📲 电报消息, type: select, proxies: [🚀 节点选择]}
  - {name: 🔒 私有网络, type: select, proxies: [🎯 全球直连]}
  - {name: 🛑 广告拦截, type: select, proxies: [REJECT]}
  - {name: 🎯 全球直连, type: select, proxies: [DIRECT]}

  ## ----------------国家或地区策略组---------------------
  ## 自动选择节点,即按照 url 测试结果使用延迟最低的节点;测试后容差大于 50ms 才会切换到延迟低的那个节点;筛选出“香港”节点,支持正则表达式
  - {name: 🇭🇰 香港节点, type: url-test, tolerance: 50, use: [🛫 我的机场 1, 🛫 我的机场 2], filter: "(?i)港|hk|hongkong|hong kong"}
  ## 节点负载均衡,即将请求均匀分配到多个节点上,优点是更稳定,速度可能有提升;将相同顶级域名的请求分配给策略组内的同一个代理节点;推荐在节点复用比较多的情况下使用
  - {name: 🇹🇼 台湾节点, type: load-balance, strategy: consistent-hashing, use: [🛫 我的机场 1, 🛫 我的机场 2], filter: "(?i)台|tw|taiwan"}
  ## 可使用 `include-all-providers: true` 代替 `use: [🛫 我的机场 1, 🛫 我的机场 2, ...]`,意思为引入所有代理集合
  - {name: 🇯🇵 日本节点, type: url-test, tolerance: 50, include-all-providers: true, filter: "(?i)日本|jp|japan"}
  - {name: 🇸🇬 新加坡节点, type: url-test, tolerance: 50, use: [🛫 我的机场 1, 🛫 我的机场 2], filter: "(?i)新|sg|singapore"}
  - {name: 🇺🇸 美国节点, type: url-test, tolerance: 50, use: [🛫 我的机场 1, 🛫 我的机场 2], filter: "(?i)美|us|unitedstates|united states"}

## 规则
rules:
  ## 自定义规则优先放前面
  ## 为了使 P2P 流量(BT 下载)走直连,可添加一条 `DST-PORT` 规则(ShellCrash 会默认开启“只代理常用端口”,可删除此条 `DST-PORT`)
  - DST-PORT,6881-6889,🎯 全球直连
  - GEOSITE,private,🔒 私有网络
  - GEOSITE,ads,🛑 广告拦截
  - GEOSITE,microsoft-cn,🪟 微软服务
  - GEOSITE,apple-cn,🍎 苹果服务
  - GEOSITE,google-cn,🇬 谷歌服务
  - GEOSITE,games-cn,🎮 游戏服务
  - GEOSITE,ai,🤖 人工智能
  - GEOSITE,networktest,📈 网络测试
  - GEOSITE,proxy,🪜 代理域名
  - GEOSITE,cn,🇨🇳 直连域名
  - GEOIP,telegram,📲 电报消息,no-resolve
  - GEOIP,private,🔒 私有网络,no-resolve
  - GEOIP,cn,🇨🇳 直连 IP
  - MATCH,🐟 漏网之鱼
将模板内容复制到自己 Gist 新建的 .yaml 文件中
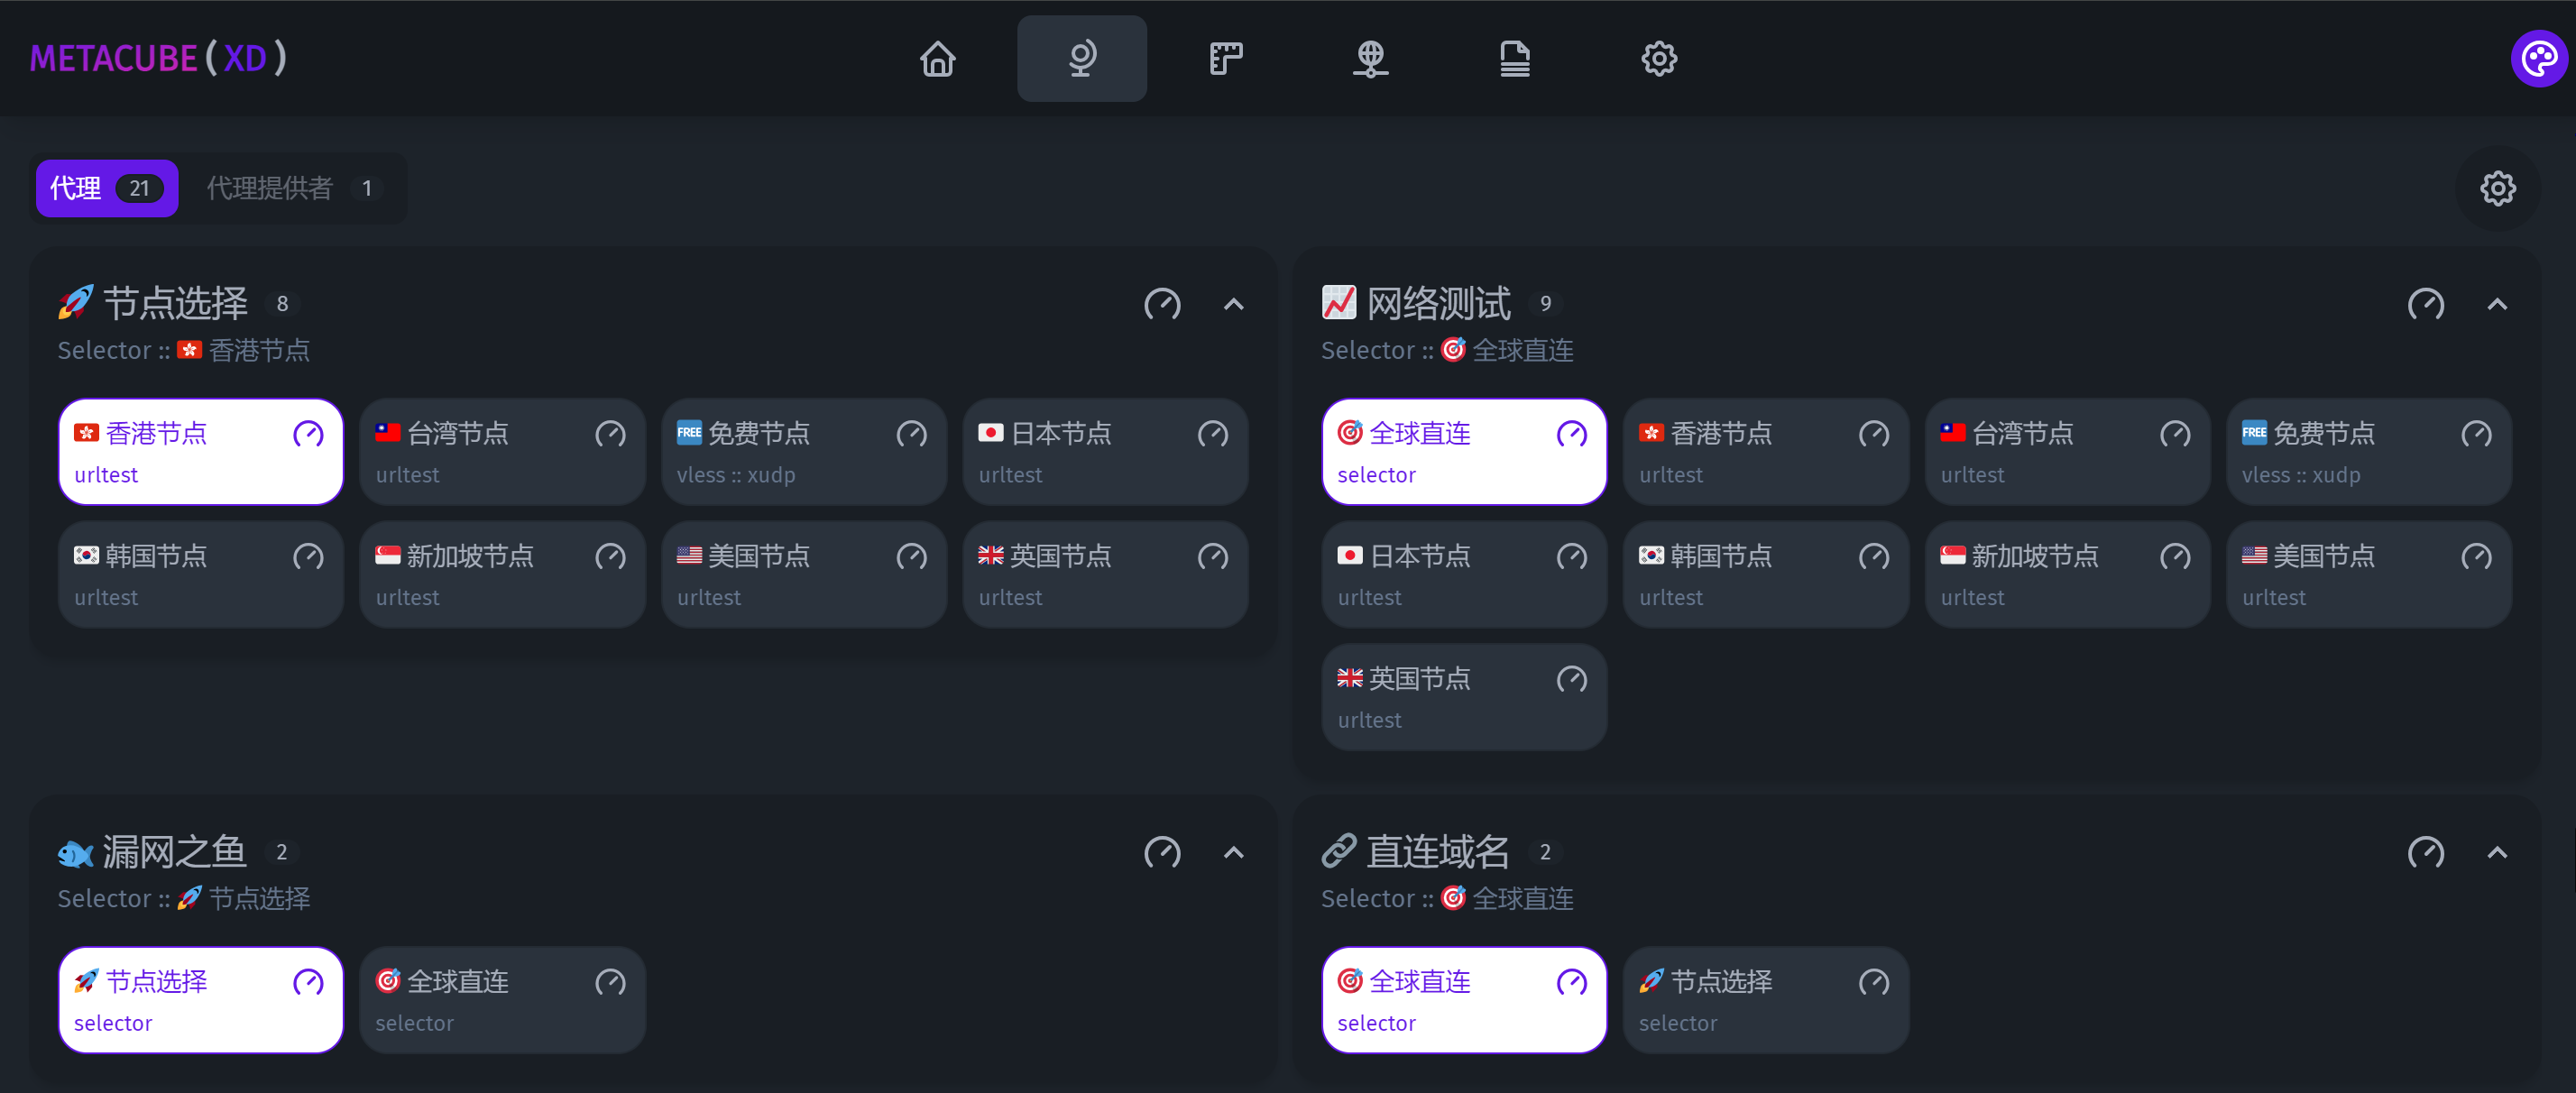
贴一张面板效果图(举个例子:我手动选择 🇹🇼 台湾节点 策略组,而该策略组是将机场内所有台湾节点按照 url 测试结果自动选择延迟最低的台湾节点):

2. 黑名单模式(只有命中规则的网络流量才使用代理,适用于服务器线路网络质量不稳定或不够快,或服务器流量紧缺的用户。通常也是软路由用户、家庭网关用户的常用模式)
1
2
3
4
5
6
7
8
9
10
11
12
13
14
15
16
17
18
19
20
21
22
23
24
25
26
27
28
29
30
31
32
33
34
35
36
37
38
39
40
41
42
43
44
45
46
47
48
49
50
51
52
53
54
55
56
57
58
59
60
61
62
63
64
65
66
67
68
69
70
71
72
73
74
75
76
77
78
79
80
81
82
83
84
85
86
87
88
89
90
## 代理集合(获取机场订阅链接内的所有节点)
proxy-providers:
  🛫 我的机场 1:
    type: http
    ## 机场订阅链接,使用 Clash 链接
    url: "https://example.com/xxx/xxx=1&flag=clash"
    path: ./proxies/airport1.yaml
    interval: 86400
    ## 初步筛选需要的节点,可有效减轻路由器压力,支持正则表达式,不筛选可删除此配置项
    filter: "(?i)港|hk|hongkong|hong kong|台|tw|taiwan|日本|jp|japan|新|sg|singapore|美|us|unitedstates|united states"
    ## 初步排除不需要的节点,支持正则表达式,若不排除可删除此配置项
    exclude-filter: "高倍|×10"
    health-check:
      enable: true
      url: https://www.gstatic.com/generate_204
      interval: 600
    override:
      ## 为节点名称添加固定前缀,如节点名称原为“香港节点”会变成“🛫 我的机场 1-香港节点”;推荐有多个机场时使用
      additional-prefix: "🛫 我的机场 1-"
      ## 为节点名称添加固定后缀,如节点名称原为“香港节点”会变成“香港节点-🛫 我的机场 1”;推荐有多个机场时使用
      additional-suffix: "-🛫 我的机场 1"

  🛫 我的机场 2:
    type: http
    url: "https://example.com/xxx/xxx=2&flag=clash"
    path: ./proxies/airport2.yaml
    interval: 86400
    filter: "(?i)港|hk|hongkong|hong kong|台|tw|taiwan|日本|jp|japan|新|sg|singapore|美|us|unitedstates|united states"
    exclude-filter: "高倍|×10"
    health-check:
      enable: true
      url: https://www.gstatic.com/generate_204
      interval: 600
    override:
      ## 为节点名称添加固定前缀,如节点名称原为“香港节点”会变成“🛫 我的机场 2-香港节点”;推荐有多个机场时使用
      additional-prefix: "🛫 我的机场 2-"
      ## 为节点名称添加固定后缀,如节点名称原为“香港节点”会变成“香港节点-🛫 我的机场 2”;推荐有多个机场时使用
      additional-suffix: "-🛫 我的机场 2"

## 单个出站代理节点(以 vless 为例)
proxies:
  - name: 🆓 免费节点
    type: vless
    server: example.com
    port: 443
    uuid: {uuid}
    network: ws
    tls: true
    udp: false
    sni: example.com
    client-fingerprint: chrome
    ws-opts:
      path: "/?ed=2048"
      headers:
        host: example.com

## 策略组
proxy-groups:
  ## 手动选择国家或地区节点;根据“国家或地区策略组”名称对 `proxies` 值进行增删改,须一一对应
  - {name: 🚀 节点选择, type: select, proxies: [🇭🇰 香港节点, 🇹🇼 台湾节点, 🇯🇵 日本节点, 🇸🇬 新加坡节点, 🇺🇸 美国节点, 🆓 免费节点]}
  - {name: 🐟 漏网之鱼, type: select, proxies: [🎯 全球直连, 🚀 节点选择]}
  ## 选择`🎯 全球直连`为测试本地网络(运营商网络速度和 IPv6 支持情况),可选择其它节点用于测试机场节点速度和 IPv6 支持情况
  - {name: 📈 网络测试, type: select, proxies: [🎯 全球直连, 🇭🇰 香港节点, 🇹🇼 台湾节点, 🇯🇵 日本节点, 🇸🇬 新加坡节点, 🇺🇸 美国节点, 🆓 免费节点]}
  - {name: 🤖 人工智能, type: select, proxies: [🇭🇰 香港节点, 🇹🇼 台湾节点, 🇯🇵 日本节点, 🇰🇷 韩国节点, 🇸🇬 新加坡节点, 🇺🇸 美国节点]}
  - {name: 🪜 代理域名, type: select, proxies: [🚀 节点选择, 🎯 全球直连]}
  - {name: 📲 电报消息, type: select, proxies: [🚀 节点选择]}
  - {name: 🔒 私有网络, type: select, proxies: [🎯 全球直连]}
  - {name: 🛑 广告拦截, type: select, proxies: [REJECT]}
  - {name: 🎯 全球直连, type: select, proxies: [DIRECT]}

  ## ----------------国家或地区策略组---------------------
  ## 自动选择节点,即按照 url 测试结果使用延迟最低的节点;容差大于 50ms 就会切换到延迟低的那个节点;筛选出“香港”节点,支持正则表达式
  - {name: 🇭🇰 香港节点, type: url-test, tolerance: 50, use: [🛫 我的机场 1, 🛫 我的机场 2], filter: "(?i)港|hk|hongkong|hong kong"}
  ## 节点负载均衡,即将请求均匀分配到多个节点上,优点是更稳定,速度可能有提升;将相同顶级域名的请求分配给策略组内的同一个代理节点;推荐在节点复用比较多的情况下使用
  - {name: 🇹🇼 台湾节点, type: load-balance, strategy: consistent-hashing, use: [🛫 我的机场 1, 🛫 我的机场 2], filter: "(?i)台|tw|taiwan"}
  ## 可使用 `include-all-providers: true` 代替 `use: [🛫 我的机场 1, 🛫 我的机场 2, ...]`,意思为引入所有代理集合
  - {name: 🇯🇵 日本节点, type: url-test, tolerance: 50, include-all-providers: true, filter: "(?i)日本|jp|japan"}
  - {name: 🇸🇬 新加坡节点, type: url-test, tolerance: 50, use: [🛫 我的机场 1, 🛫 我的机场 2], filter: "(?i)新|sg|singapore"}
  - {name: 🇺🇸 美国节点, type: url-test, tolerance: 50, use: [🛫 我的机场 1, 🛫 我的机场 2], filter: "(?i)美|us|unitedstates|united states"}

## 规则
rules:
  ## 自定义规则优先放前面
  - GEOSITE,private,🔒 私有网络
  - GEOSITE,ads,🛑 广告拦截
  - GEOSITE,ai,🤖 人工智能
  - GEOSITE,networktest,📈 网络测试
  - GEOSITE,proxy,🪜 代理域名
  - GEOIP,telegram,📲 电报消息,no-resolve
  - MATCH,🐟 漏网之鱼
将模板内容复制到自己 Gist 新建的 .yaml 文件中
三、 修改模板
- 将代理集合
proxy-providers中的url链接改成自己机场的订阅链接(必须为 Clash 订阅链接,详见《前言:4》) - 确定自己机场中有哪些国家或地区的节点,然后对模板文件中“国家或地区策略组”以及
🚀 节点选择、📈 网络测试和🤖 人工智能策略组下的proxies里面的国家或地区进行增删改- 注:两者中的国家或地区必须一一对应,新增就全部新增,删除就全部删除,修改就全部修改(重要)
- 在“国家或地区策略组”中的
filter支持正则表达式,可以精确地筛选出指定的国家或地区节点
例如:我想筛选出“香港 IPLC”节点,filter可以这样写:filter: "香港.*IPLC|IPLC.*香港"- 小窍门:使用 ChatGPT 等 AI 工具查询符合自己要求的正则表达式
- 在
🚀 节点选择策略组下的proxies里,可以将最稳定的节点放在最前面,配置完成后会自动选择最稳定的节点 - 在“国家或地区策略组”里,
type为url-test就是自动选择延迟最低的节点,将url-test改成select就是手动选择节点
举个例子:我的机场包含有 2 个节点,分别是新加坡节点和日本节点,我想让 Netflix 自动选择延迟最低的新加坡节点,哔哩哔哩可以手动选择日本任一节点,这个需求怎么写?
注:- 以下只是节选,请酌情套用
- 本教程搭配的路由规则文件包含有
netflix和bilibili
- 本教程搭配的路由规则文件包含有
1
2
3
4
5
6
7
8
9
10
11
12
13
14
15
16
17
18
## 策略组
proxy-groups:
  ## 默认选择新加坡节点
  - {name: 🎥 奈飞视频, type: select, proxies: [🇸🇬 新加坡节点]}
  ## 默认选择日本节点,也可切换到直连
  - {name: 📺 哔哩哔哩, type: select, proxies: [🇯🇵 日本节点, 🎯 全球直连]}
  ## 自动选择延迟最低的新加坡节点;容差大于 50ms 才会切换到延迟低的那个节点
  - {name: 🇸🇬 新加坡节点, type: url-test, tolerance: 50, include-all-providers: true, filter: "(?i)(新|sg|singapore)"}
  ## 手动选择日本任一节点
  - {name: 🇯🇵 日本节点, type: select, include-all-providers: true, filter: "(?i)日本|jp|japan"}
  - {name: 🎯 全球直连, type: select, proxies: [DIRECT]}

## 规则
rules:
  ## 自定义规则优先放前面
  - GEOSITE,netflix,🎥 奈飞视频
  - GEOIP,netflix,🎥 奈飞视频,no-resolve
  - GEOSITE,bilibili,📺 哔哩哔哩
- 若有其它需求,可以导入 MetaCubeX/meta-rules-dat 路由规则文件,并分别进入 MetaCubeX/meta-rules-dat/meta/geo 的 geosite 和 geoip 目录搜索关键字,通过能够搜索到的关键字来编写规则
四、 生成 .yaml 文件链接
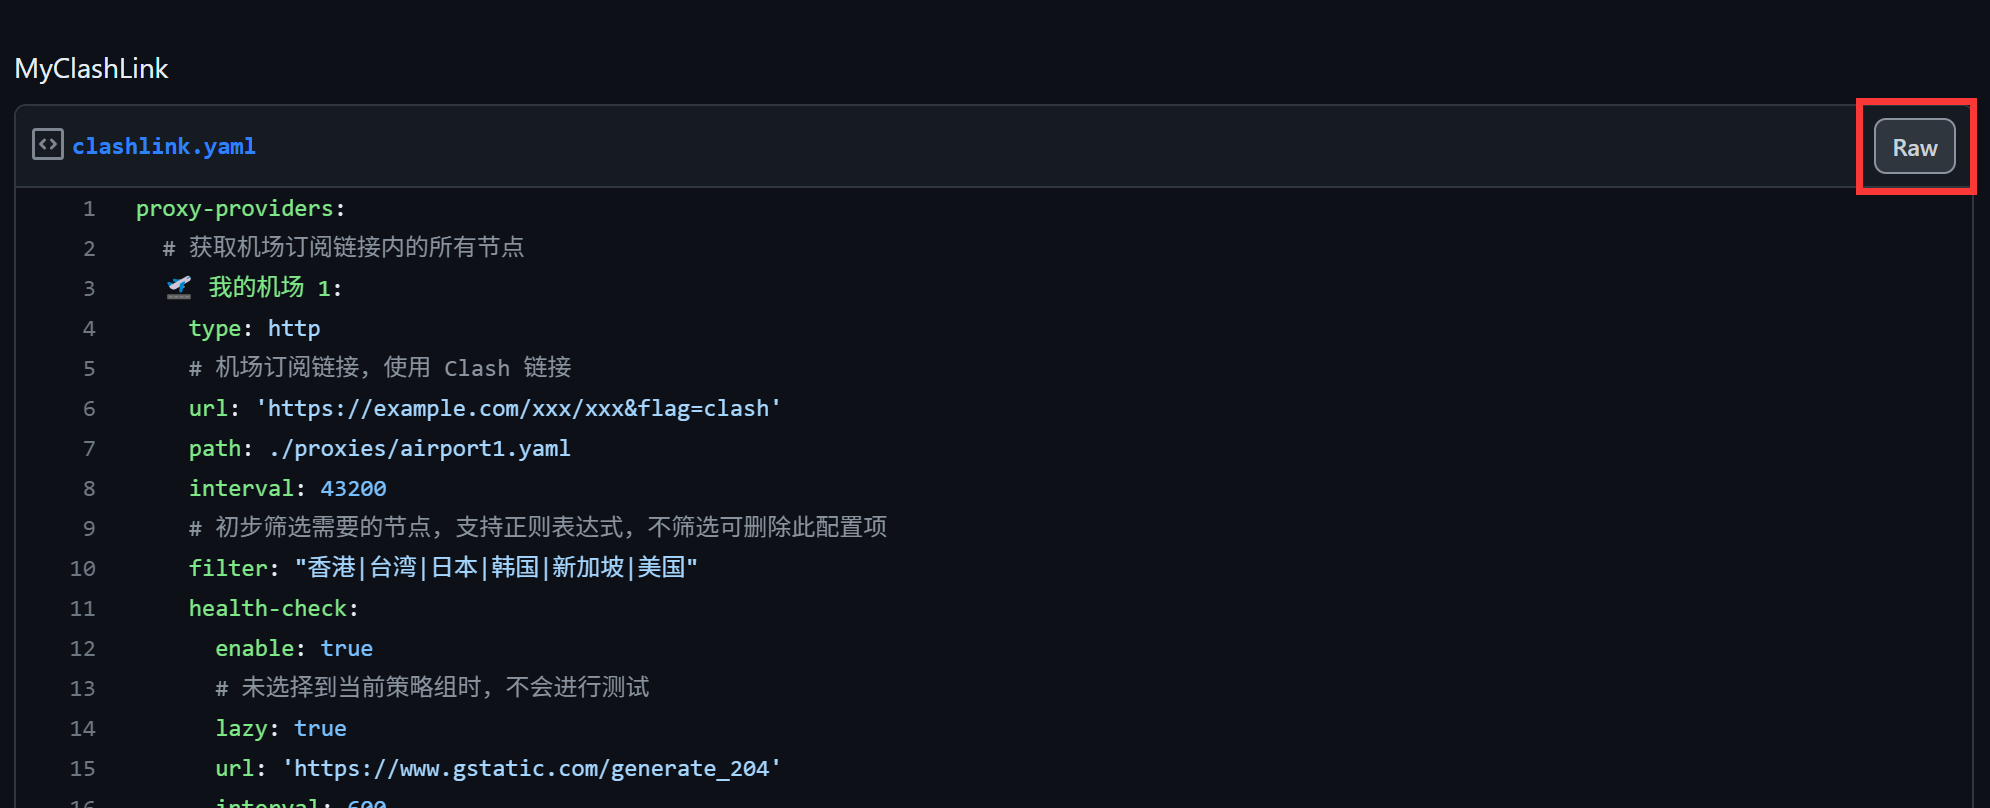
取出地址栏中的网址,删除后面的一串随机码,完成后该 .yaml 文件直链才是最终生成的订阅链接,该订阅链接地址不会改变,在不更改文件名的情况下即使编辑该 .yaml 文件并提交了 n 次也不会改变。举个例子,这是原地址:
https://gist.githubusercontent.com/DustinWin/f5995e5002fb729380c02dbc38669149/raw/064134b248dddb3a77d85acf45d084751c57ed11/clashlink.yaml
删除后面的一串随机码(当前编辑该文件生成的随机码“064134b248dddb3a77d85acf45d084751c57ed11”)

删除后变成:
https://gist.githubusercontent.com/DustinWin/f5995e5002fb729380c02dbc38669149/raw/clashlink.yaml
五、 导入订阅链接
1. 在 ShellCrash 中导入订阅链接
进入 ShellCrash 配置脚本 -> 6 -> 2,粘贴最终生成的订阅链接即可,具体设置请参考《ShellCrash 搭载 mihomo 内核的配置-geodata 方案》
2. 在 Clash Verge 中导入订阅链接
进入 Clash Verge -> 订阅,在“订阅文件链接”处粘贴最终生成的订阅链接,直接“导入”即可,具体设置请参考《Clash Verge 搭载 mihomo 内核的配置-geodata 方案》
